Luxury car seat covers should protect your interior without hiding its original character. This guide explains how to install luxury car seat covers properly, using careful preparation, accurate fitting, and patient finishing.
Daniel Mercer, an automotive upholstery trainer with more than 20 years of workshop experience, says, “A premium cover fails when the fit is rushed; luxury is felt in the final alignment.” His advice matters because tight leather, suede, and quilted materials reveal every mistake. Before installation, inspect each seat for sharp edges, loose trim, heated-seat controls, and existing damage. Read the manufacturer’s instructions carefully. Compatibility comes before appearance.
Start with a clean cabin. Remove dust from seams using a soft brush and vacuum nozzle. Let the covers reach room temperature, especially after delivery during cold weather. Cold material can feel stiff and mislead your fitting. Label each panel before placing it over the seat. Keep the center sections straight, then secure side panels gradually. Do not force straps around moving rails or electrical components.
Small adjustments matter.
Smooth wrinkles toward the seams, not across the center. Check that seat belts retract freely and that headrests move without resistance. Test folding seats and built-in controls before driving. Airbag-compatible covers require special attention; never block marked deployment zones. A professional installer should inspect uncertain designs.
My own caution is simple: a nearly perfect fit may still need correction. Luxury materials can stretch unevenly after use. Recheck the covers after several days, then tighten or reposition them gently. The best result looks integrated, feels comfortable, and preserves safe seat movement.
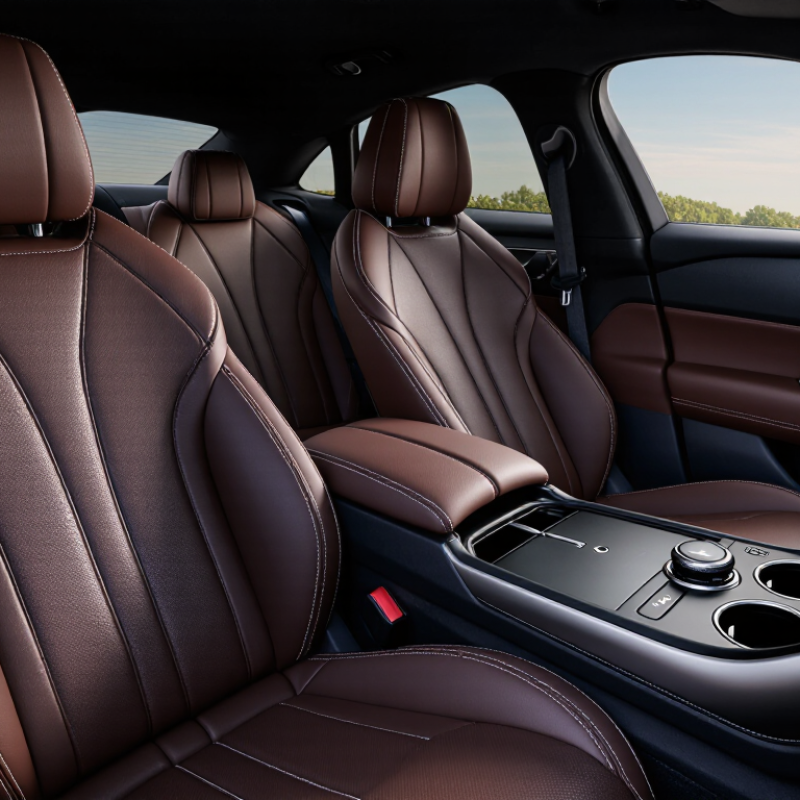
2026 Top Guide: How to Install Luxury Car Seat Covers?
Choosing luxury car seat covers starts with fit, not appearance. Check your vehicle’s exact year, model, body style, and seat layout. A cover made for a similar vehicle may still block controls or wrinkle across the cushion. Measure the seat width, backrest height, headrest posts, and side bolsters before ordering. Small differences matter.
Inspect the seats carefully. Side-impact airbags often deploy from the outer seatback. The covers must include compatible seams and openings in the correct positions. Never cover an airbag area with thick, fixed material. Check access to seat belts, child-seat anchors, electric controls, heating, and ventilation. Rear seats may use 60/40 or 40/20/40 folding sections, so one-piece covers can restrict movement. Read the vehicle manual and the cover’s installation instructions together.
Luxury materials should feel soft but remain stable during braking. Leather-like surfaces can slide if the backing is poor. Breathable fabric may suit heated seats better. I once judged a cover by its stitching and ignored the loose lower straps. It looked refined, but shifted after several drives. That mistake changed my fitting process. Install slowly, smooth each panel, and test every seat function afterward. Leave enough clearance around buckles and anchors. If the fit remains uncertain, ask a qualified automotive interior technician to inspect it.
Use this practical checklist to select seat covers that fit the vehicle, preserve important safety functions, and support a clean luxury finish.
| Step | Category | What to Check | Recommended Practice | Verification Result |
|---|---|---|---|---|
| 1 | Vehicle Identification | Model year, body style, and seating layout | Record the vehicle year, model, body configuration, number of seating rows, and seat count. A cover made for a similar-looking vehicle may still have different seat dimensions or attachment points. | Exact vehicle details recorded |
| 2 | Seat Measurement | Seat width, backrest height, and cushion depth | Measure the seat cushion at its widest point, the backrest from cushion to top, and the usable cushion depth. Keep the measuring tape relaxed rather than stretched tightly. | Measurements compared with the cover size chart |
| 3 | Seat Configuration | Headrests, armrests, folding sections, and split benches | Confirm whether the front headrests are removable, whether the rear backrest folds in a split configuration, and whether the center section has an armrest or pass-through opening. | All movable sections accounted for |
| 4 | Safety Compatibility | Side airbags and seat-mounted safety equipment | Use only covers specifically identified as compatible with the vehicle's seat-mounted side-airbag arrangement. Do not use covers that block, tightly wrap, or require sewing across an airbag deployment area. | Airbag-safe construction confirmed |
| 5 | Belt and Buckle Access | Seat-belt buckles, anchors, and latch points | Check that every buckle, belt receiver, and anchor remains visible and freely accessible after installation. Never place fabric over a buckle opening or interfere with belt movement. | Belts and buckles operate freely |
| 6 | Material Selection | Durability, comfort, breathability, and maintenance | For frequent use, choose abrasion-resistant upholstery with secure stitching. Breathable woven materials can improve comfort, while smooth surfaces are easier to wipe clean. Check washing and care instructions before purchase. | Material suits climate and daily use |
| 7 | Surface Preparation | Clean and unobstructed seats | Remove personal items, vacuum loose debris, and clean the seat surface according to the vehicle upholstery instructions. Allow damp areas to dry before fitting the covers. | Seats are clean and dry |
| 8 | Front Cover Installation | Backrest orientation and headrest openings | Identify the driver and passenger covers, slide each cover over the backrest in the correct direction, and align seams with the seat contours. Reinstall headrests only after the openings are properly aligned. | Seams and openings are centered |
| 9 | Cushion Attachment | Straps, hooks, elastic edges, and clearance | Tuck the cover evenly into the gap between the backrest and cushion. Route straps and hooks beneath the cushion only where the seat design permits, keeping them away from wiring, rails, and moving mechanisms. | Cover is secure without pinching components |
| 10 | Rear Seat Installation | Folding function and split-seat alignment | Install each rear section separately when the seatback folds independently. Align seams with the split line and leave all release handles, hinges, and pass-through openings unobstructed. | Rear seats fold and release normally |
| 11 | Fit and Appearance | Wrinkles, tension, movement, and symmetry | Smooth the material from the center outward. The cover should remain close to the upholstery without excessive tension, loose folds, exposed gaps, or movement during normal entry and exit. | Even, tailored appearance achieved |
| 12 | Final Safety Test | Seat adjustment, belt function, and controls | Move the seat forward and backward, adjust the backrest, test the recline and folding functions, and fasten each belt. Confirm that no cover section catches on rails, levers, wiring, or release handles. | All controls and restraints work normally |
| 13 | Maintenance Plan | Cleaning frequency and inspection points | Remove spills promptly, follow the care label, and inspect seams, straps, hooks, and airbag-release areas periodically. Refit the covers if they shift after repeated use. | Care instructions retained |
Safety note: If a cover obstructs a seat-mounted airbag, seat belt, buckle, seat sensor, or seat adjustment mechanism, remove it and consult the vehicle owner's manual or a qualified installation professional before continued use.
Check the vehicle’s exact year, model, body style, and seat layout. Measure seat width, backrest height, headrest posts, and side bolsters. Small differences can cause wrinkles or blocked controls. Appearance comes later.
Side-impact airbags may deploy from the outer seatback. Covers need compatible seams and correctly positioned openings. Never use thick, fixed material over an airbag area. If uncertain, ask a qualified automotive interior technician.
Inspect seat belts, child-seat anchors, electric controls, heating, and ventilation. Check whether rear seats fold in separate sections. A one-piece cover may restrict a 60/40 or 40/20/40 seat.
Park on level ground and switch off the ignition. Press the release button while lifting the headrest straight upward. Some vehicles hide another latch under a trim cap. Check the vehicle manual first. Do not force it.
Feed straps beneath the cushion without touching wiring, sensors, or power-seat tracks. Keep straps flat and untwisted. Test each connector with a controlled pull. Too much force can damage a clip.
Align the cover seams with the original seat stitching. Pull the material evenly from the top downward. Center the seatback before tightening lower straps. Smooth panels by hand. Do not overstretch the material.
Use bright light to check stitching, zippers, elastic edges, and belt-buckle gaps. Move the seat forward, backward, and into reclining positions. Confirm the buckle remains accessible. Nothing should pinch or slide.
Wait several minutes and smooth wrinkles by hand first. Use heat only when the material instructions approve it. Excessive heat may damage the surface. I once trusted appearance too quickly. The lower straps later loosened.
Sit normally, fasten the belt, and move across the seat. Check the covers again after a short drive. A hidden strap may shift under a dark cushion. Inspect from several angles. Take your time.
This guide explains how to install luxury car seat covers properly while achieving a clean, secure, and comfortable finish. It begins with selecting covers that match your vehicle’s seat dimensions, design, and safety features. Before installation, prepare the interior by cleaning the seats, removing loose items, and gathering basic tools such as trim tools, fasteners, and a flashlight. Checking the cover layout and vehicle compatibility in advance can prevent fitting problems later.
The installation process covers removing the headrests, positioning the front-seat covers, and aligning openings for controls, belts, and adjustment levers. Rear-seat covers require careful fitting around seat belts, armrests, and folding sections without blocking their movement. After all pieces are installed, tighten straps and fasteners evenly, smooth out wrinkles, and check that the seats can slide, fold, and recline normally. A final inspection should confirm that the covers remain secure and do not interfere with essential safety functions.

 Molas Auto